How to Build a GUI with ASP.NET Core and Blazor for Torizon OS
Introduction
In this article, we will show how you can use the ASP.NET Core Blazor Server to create a local or remote graphical user interface.
To illustrate the process, we will:
- Use a sample that reads GPS coordinates from the UART (serial) interface with .NET Core and Visual Studio Code Extension for Torizon.
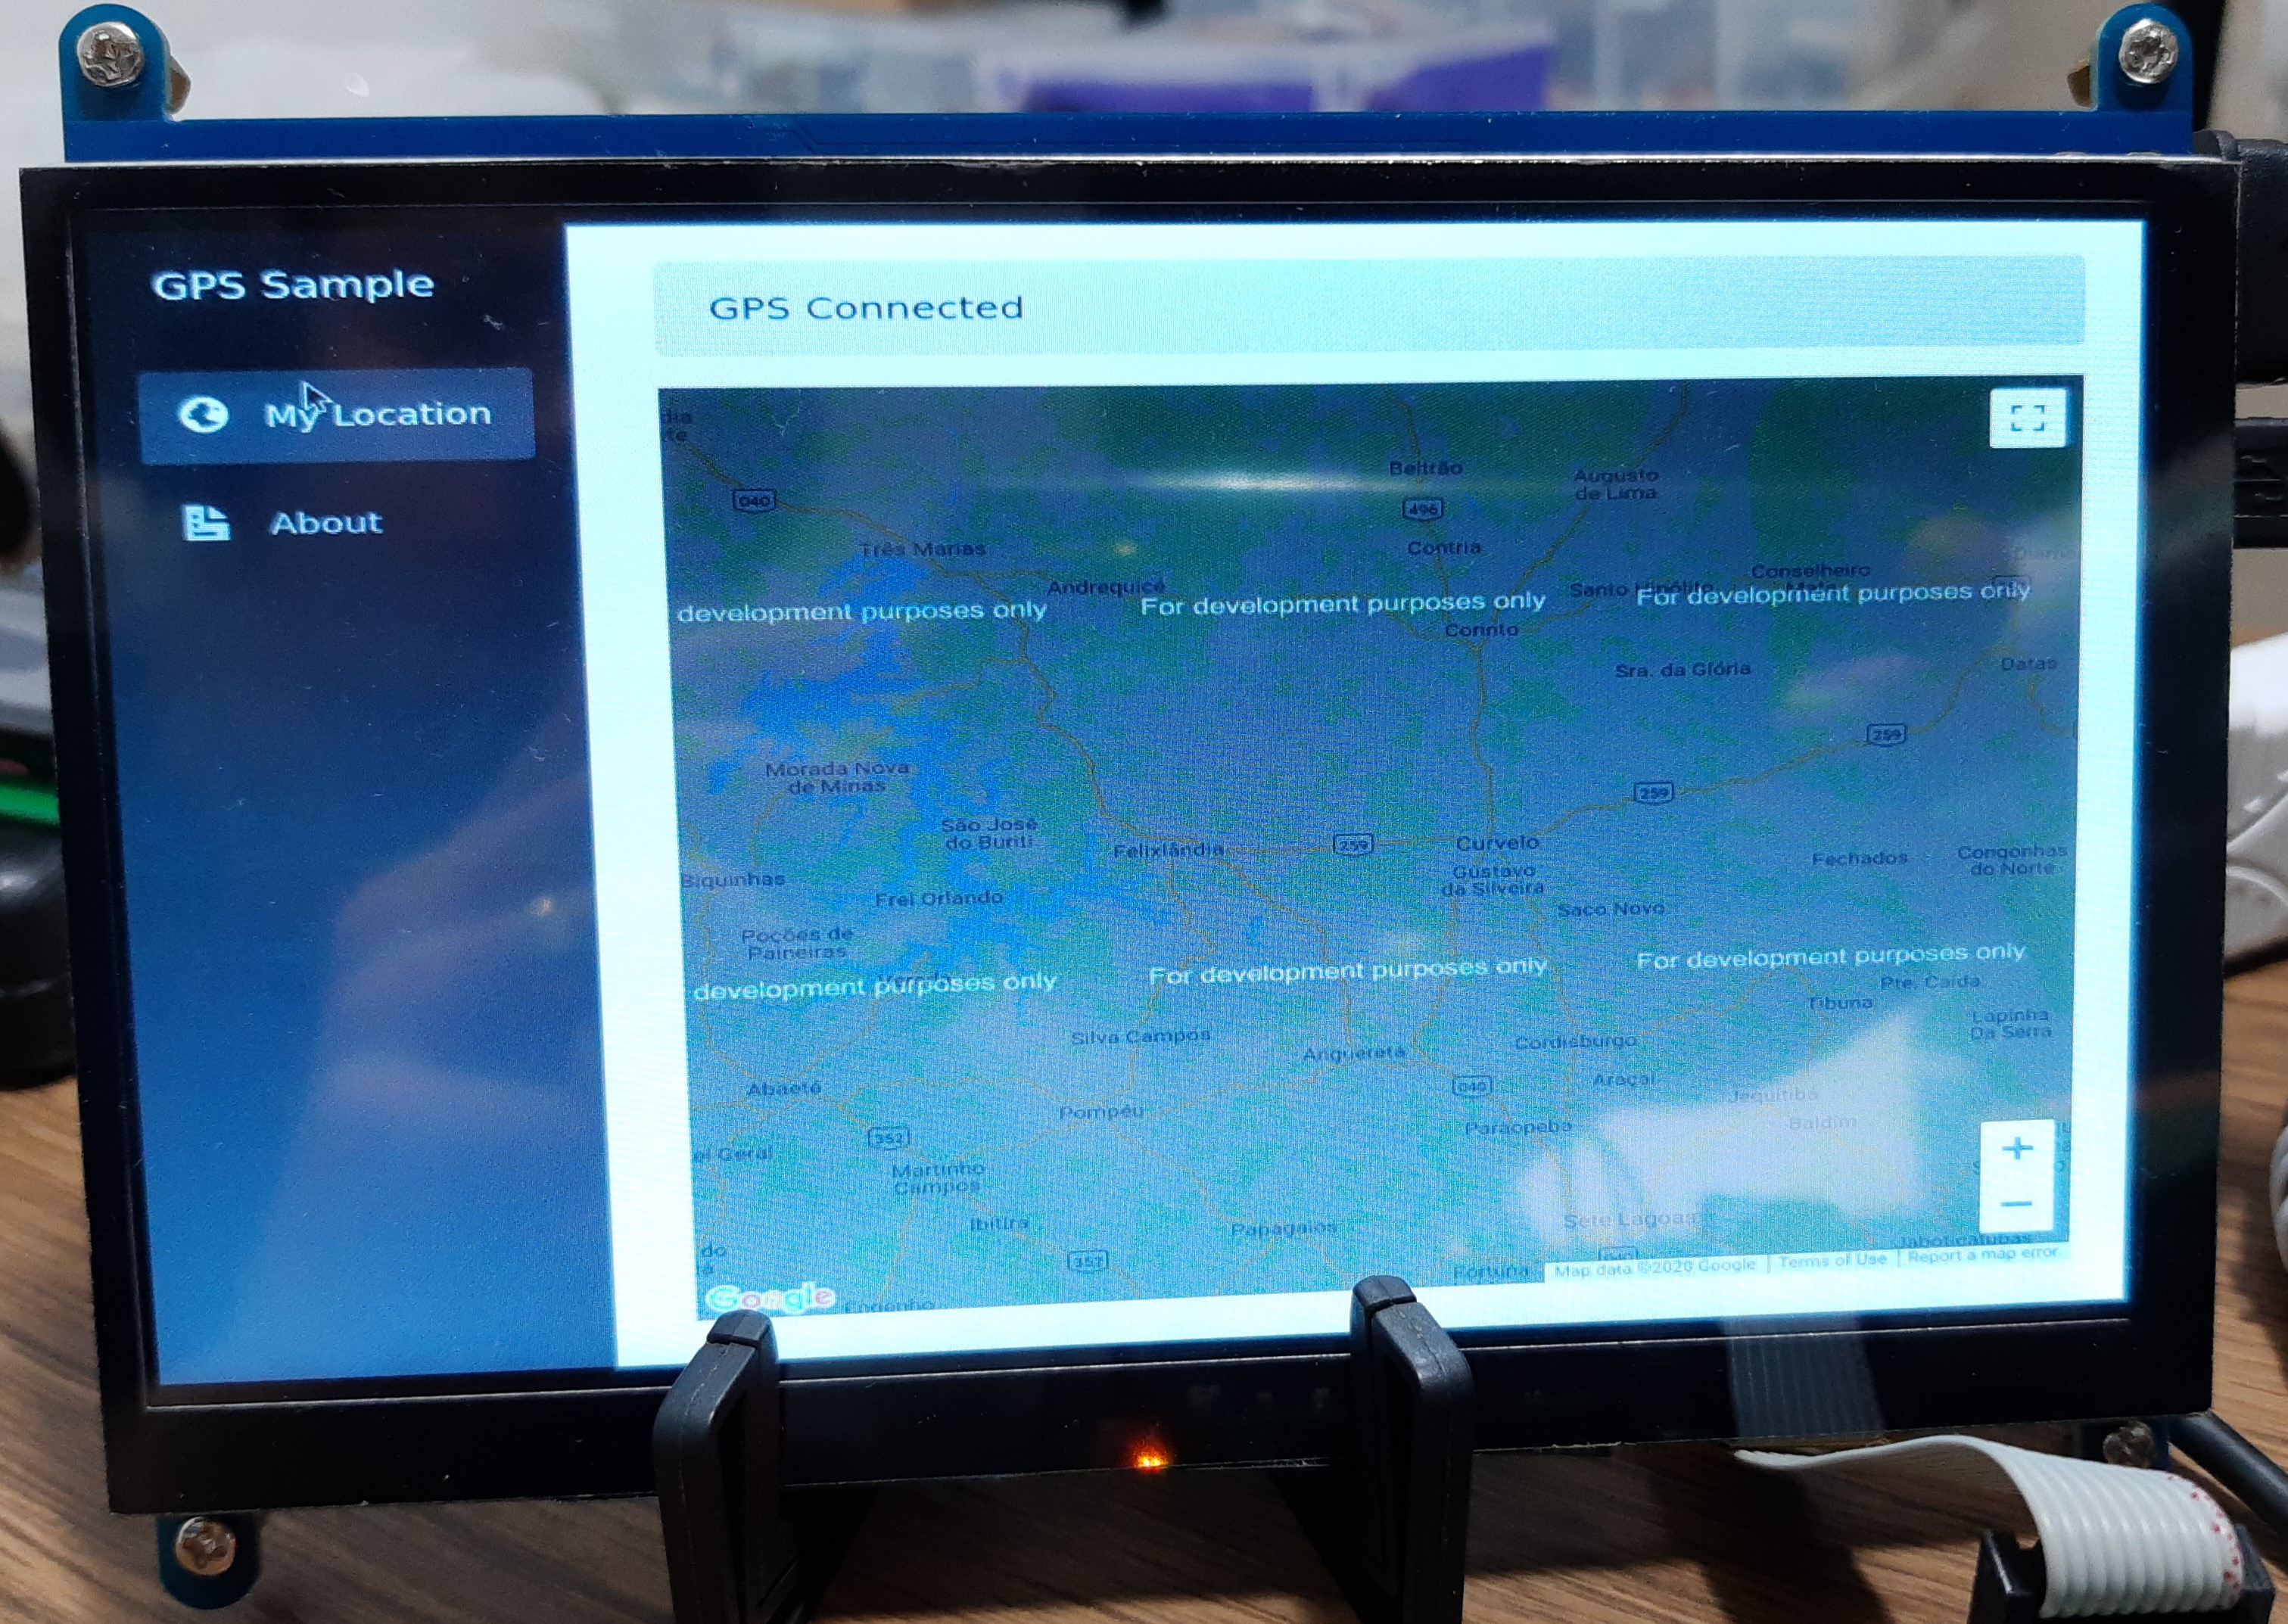
- Use the ASP.NET Core Blazor Server template to display the GPS coordinates on a Google Maps visualization.
Prerequisites
- Torizon OS installed on a Toradex module.
- Have completed the .NET Core Development and Debug on Torizon OS Using Visual Studio Code lessons.
- Have completed the .NET Core - Using Serial UART GPS
- Google Maps Platform API Key
- (optional) HDMI Display or Capacitive Touch Display 7" Parallel Touch Display for Local UI
Application Architecture
In this example, we will show a way to use ASP.NET Core Blazor application as a Local and Remote user interface solution. For that we will use a multi-container architecture:
Weston Container:
- Wayland compositor;
Kiosk Browser Container:
- Chromium browser for the local UI, that will open, in full-screen kiosk mode, the ASP.NET Core Blazor application. Chromium is a graphic application that depends on Weston to run;
Application Container
- ASP.NET Core Blazor application that will manage the serial UART GPS connection and UI design;
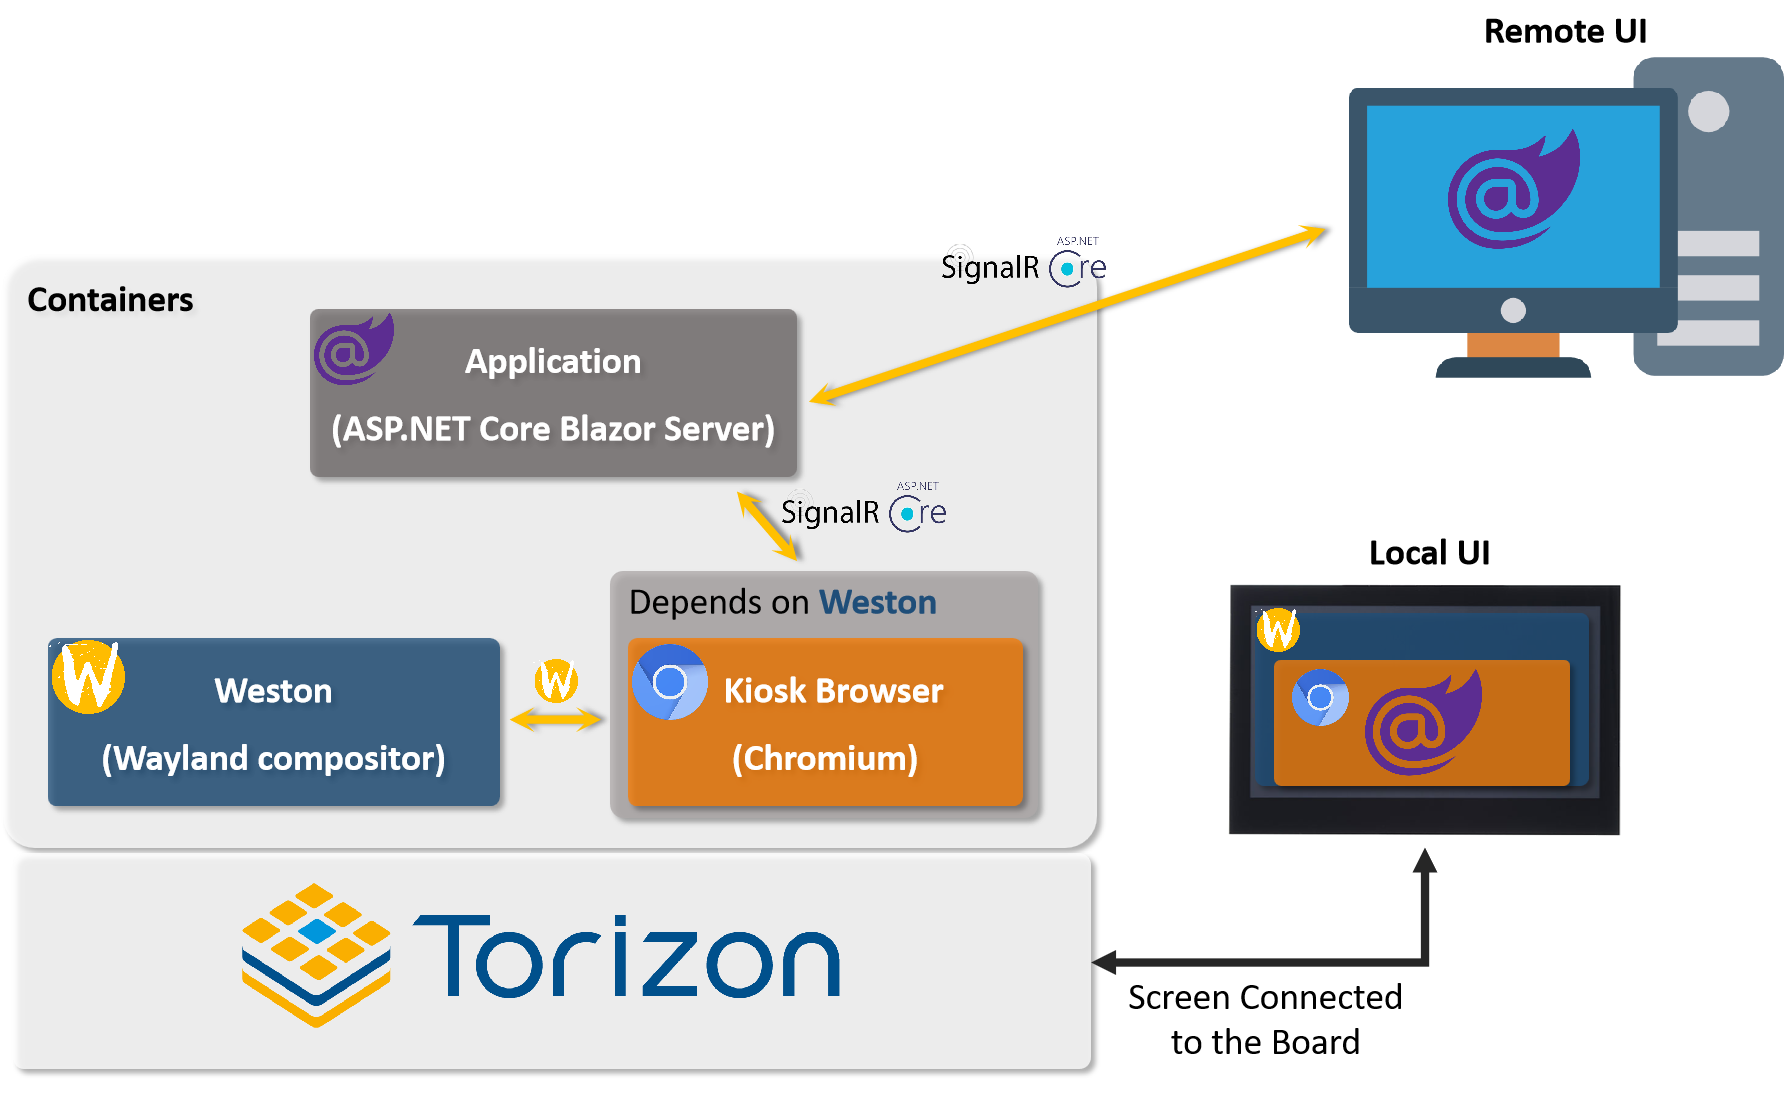
With this multi-container architecture running we can access the application ASP.NET Core Blazor page, either remotely through the board IP address, on a computer or device connected to the same network, or interact with the application on a display connected to the board, that will show the Kiosk browser running.
Connect to a Serial GPS
For example, in this article, we will follow the same steps for connecting the GPS from the section Connect to a Serial GPS from How to Use UART with Torizon Visual Studio Code Extension (.NET Core) article.
Instructions
In this article, we will focus on the creation of ASP.NET Core Blazor application using Torizon Visual Studio Code extension.
Create a New ASP.NET Core Project
On VS Code press F1 and:
- Select the command
Torizon/.NET: Create ASP.NET Application - Type the application name
blazorGoogleMaps - Select a folder to store the project files
- On the project templates list select
ASP.NET Blazor Application - Select the architecture
arm32orarm64for the target Toradex Board - Confirm, pressing enter, the default
torizonuser
Add UART Device to Project
To add a UART device to your ASP.NET Core Blazor Torizon project, first, open the Torizon Configuration View. To do that, press F1 in Visual Studio Code command bar and then type "Torizon: Focus on Configurations View"

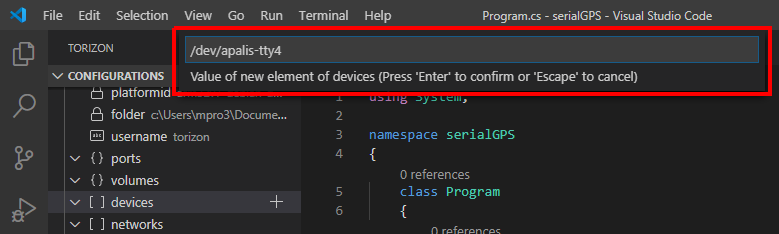
On the device item, press the '+' button on the right.
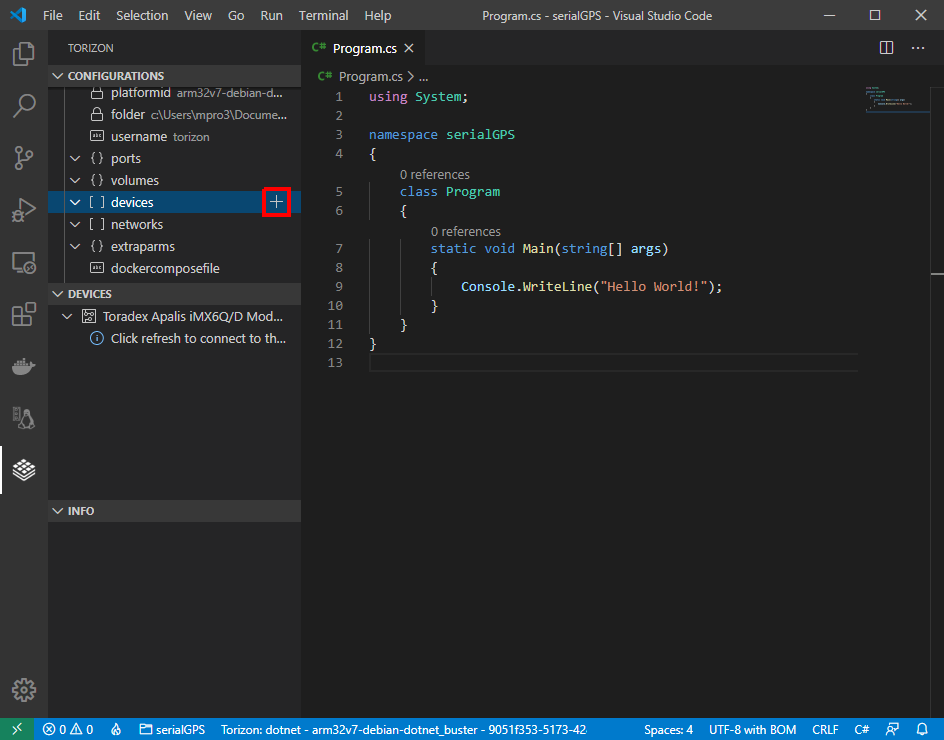
Type the selected tty device. As an example, we will add /dev/apalis-tty4.
/dev/apalis-tty4 is UART4 in the case of the Apalis family. See more information in the article How to Use UART on Torizon OS
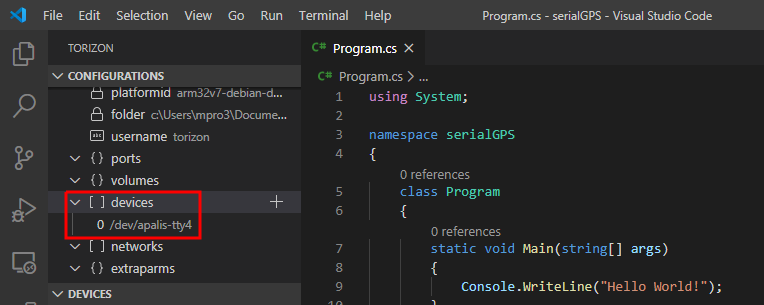
Check if the device was added to your project.
Add Serial Access Permission
To have access to the serial devices we need to add the default torizon user to dialout group. Go to the Torizon Visual Studio Code Extension Configurations and add the buildcommands:
RUN usermod -a -G dialout torizon
Add Nuget Packages
To easily parse NMEA data from the GPS module, we use the SharpGIS.NmeaParser library. To add it to the project open a new terminal using the Visual Studio Code and enter the following command:
dotnet add package SharpGIS.NmeaParser
Source Code
The example code used in this documentation comes from the sample https://github.com/toradex/torizon-samples/gps/dotnet/blazor/
You can copy the contents of the files and folders, listed below, to your project created in the sections above, choosing the overwrite option. Or just open the samples/gps/dotnet/blazor folder in VS Code to use with Torizon Visual Studio Code Extension:
- /Models
- /Pages
- /Services
- /Shared
- /wwwroot
- _Imports.razor
- App.razor
- Program.cs
- Startup.cs
- /appconfig_0/docker-compose.arm32v7.yml
- /appconfig_0/docker-compose.arm64v8.yml
Google Maps Configuration
To use Google Maps you will need a Google Maps Platform API Key, follow the developer's Google documentation to get an API Key: https://developers.google.com/maps/documentation/javascript/get-api-key
With a Google Maps Platform API Key created edit the file Pages/_Host.cshtml on the line 35:
<script src="https://maps.googleapis.com/maps/api/js?key=NULL&v=3"></script>
Modifying the key=NULL property by key=<your API key>
Set SerialPortDevice.PortName
Modify the serial device path according to the serial device you are using. Edit the file Services/GPS.cs on the line 20:
serialDev.PortName = "/dev/apalis-tty4";
With the correct device set we can now run and debug the application.
Run Application Debug
Remote UI
On VS Code press F5 to run the Debug. See the .NET Core Development and Debug on Torizon OS Using Visual Studio Code article for detailed instructions about debugging tools.
You can access the running ASP.NET Core Blazor page application remotely through the IP address of the board on the port 8841* in a browser. You can also set break-points in the code and interact with the application on the remote UI to debug:
- in previous versions this was 5000, if you can't connect check if your project is still using the old port.
Local UI
Set docker-compose File
To configure the application for show the local UI, on the display connected to the board, we still have to configure a docker-compose.yml file that will have the dependency containers and settings to run our multi-container application.
On the sample folder appconfig_0 we have two docker-compose files:
- docker-compose.arm64.yml for ARMv8 64bits Toradex Modules
- docker-compose.arm32.yml for ARMv7 32bits Toradex Modules
Using the Torizon Configurations on VS Code edit the property dockercomposefile with the name of the file that corresponds to the architecture of your board:
Press F5 to run the application debug. This will run the docker-compose multi-container application.
You can also set break-points in the code and interact with the application on the local or remote UI to debug.
See the .NET Core Development and Debug on Torizon OS Using Visual Studio Code article for detailed instructions about debugging tools.